Cisco RVS4000 to Juniper SSG VPN using IPSec
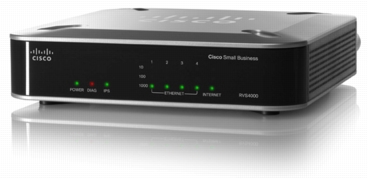
The Cisco RVS4000 is a small/home office or SoHO Router with an ethernet WAN that would commonly be placed behind another router that would give connectivity to the internet and supply the Cisco RVS4000 with a public IP address.
The Cisco RVS4000 SoHO Router
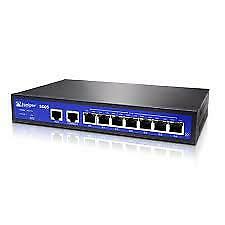
The Juniper SSG series are highly configurable routers that may well be used as the firewall/router for the connection at a head office, which is the position we are assuming here.
Juniper SSG Series Router
We shall need the following to complete this:
- The subnet of the SoHo router LAN
- The subnet of the Juniper router LAN we wish to access at the head office
- The VPN endpoint or gateway address (the external WAN address of the Juniper at head office we are connecting to)
- The pre-shared key we intend to use. This is a pre-agreed confidential string of alphanumeric or ASCII (if supported) characters that are shared between the parties configuring the VPN which allows the routers to encrypt the traffic between each VPN endpoint (the Juniper and Cisco) allowing traffic to remain fully encrypted without having to swap private keys as with TLS.
The Cisco initially will have the IP range 192.168.1.1/24. In this case we shall change this range to avoid any confusion with any other possible hosts outside of the Cisco's LAN on the user's home network, such as devices belonging to other members of the family. We do not wish our VPN to be accessible by devices that may be vulnerable to wireless attack, and so only our user;s devices will be in the separate subnet behind the Cisco VPN router.
To start with we configure the Cisco with remote HTTPS for configuration on an obscure port such as 9099 or similar. This will enable HQ to reconfigure the VPN should there be a change in requirement. The IP subnet and range is obscured in the below, but you should use the information you have from each of the routers you are connecting via VPN.
Now, we go on to configure a VPN.
Go to the VPN IPSec page of the router:
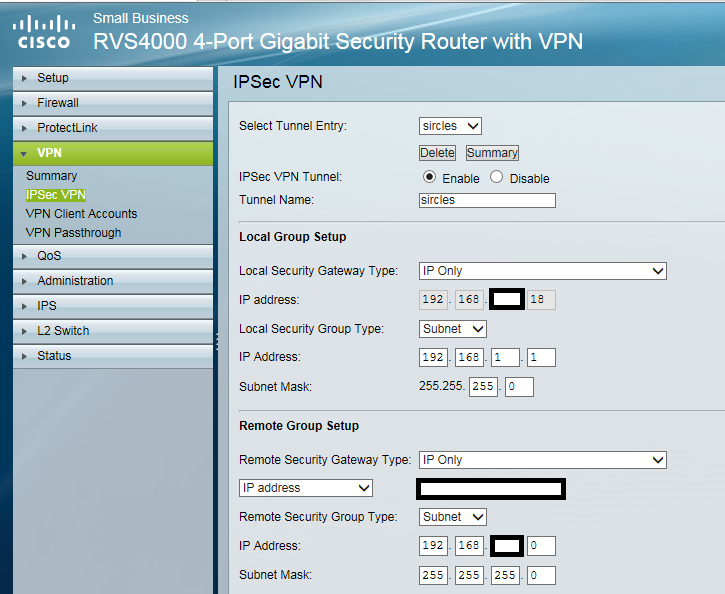
We shall configure the VPN as an IP only gateway which will connect the VPN without any hostname or functioning DNS.
Enable the VPN and use the destination as a tunnel name.
Use Subnet as the security type. This encrypts all traffic for that subnet and routes said traffic to the endpoint (remote host) associated with that tunnel.
The subnet mask is a class C of 255.255.255.0 in this case.
Now we choose to use IP Only as the remote Juniper network endpoint which uses the WAN IP of the Juniper as authentication of the remote device. The Remote Security Gateway above is where we enter the remote Juniper WAN IP.
The IP address and subnet mask represents the internal network behind the Juniper router at head office, in the above case another Class C /24 subnet.
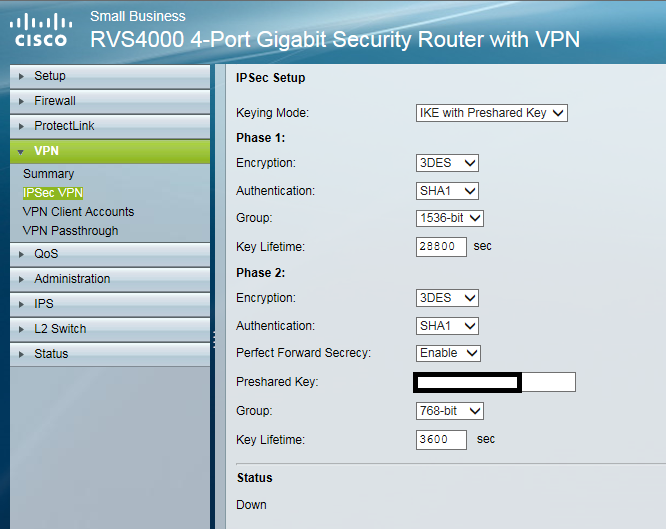
Now choose IKE with a pre-shared key.
Select 3DES encryption for phase 1 - this is the best encryption the Cisco offers, but if your model offers better, select AES256 if you can as the Juniper will support it.
Set phase 1 authentication to SHA1
Select Group 5 1536-bit authentication and key lifetime as 28800.
Set phase 2 as 3DES, SHA1 and enable PFS before entering the preshared key. The authentication has been left at Group 1 768-bit
Now down to the advanced section:
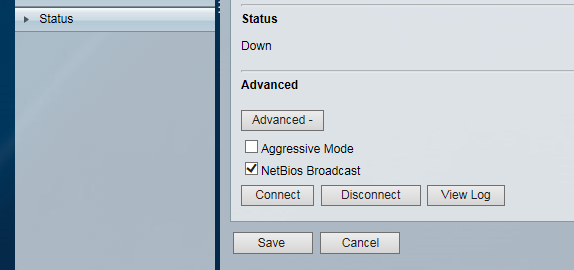
Set NETBIOS broadcast as enabled for networks for Windows devices.
Configuring the Juniper
Each part of the Juniper VPN must be configured separately, and we must configure a policy to enable traffic through the VPN tunnel:.
At the Network menu and select Interfaces > List.
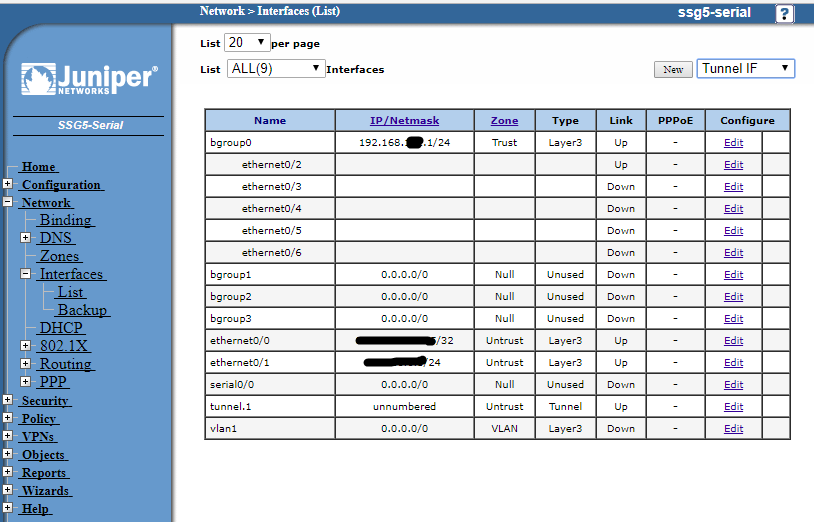
Using the drop down menu at the top right of the screen, choose Tunnel IF and then click New.
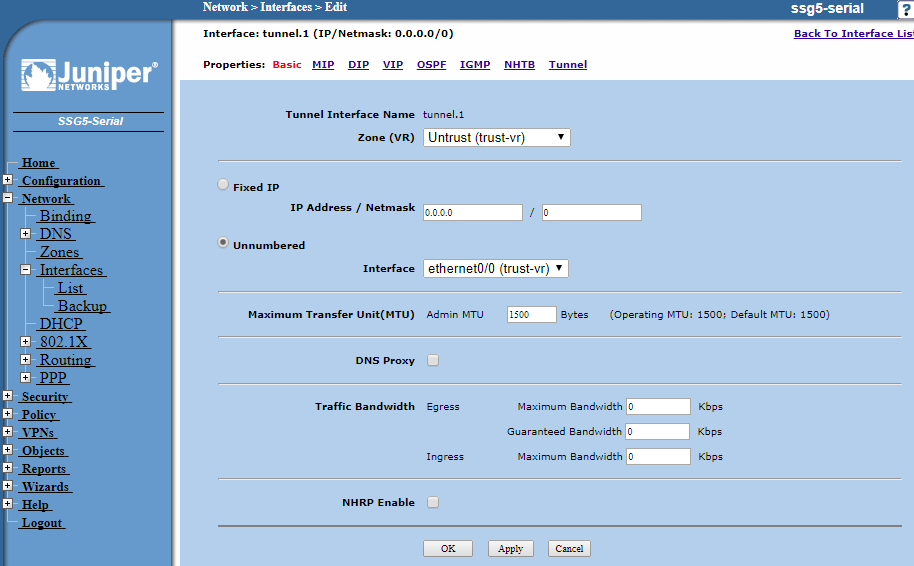
Select the Zone as Untrust (trust-vr) as this zone will be connected via the Internet outside the untrusted perimeter of the Juniper firewall.
Check the bubble for unnumbered - this is a routed VPN
In Interface select the WAN interface the Cisco is targeted at & click Apply.
Click the Tunnel link at the right-hand-side of the menu links at the top.
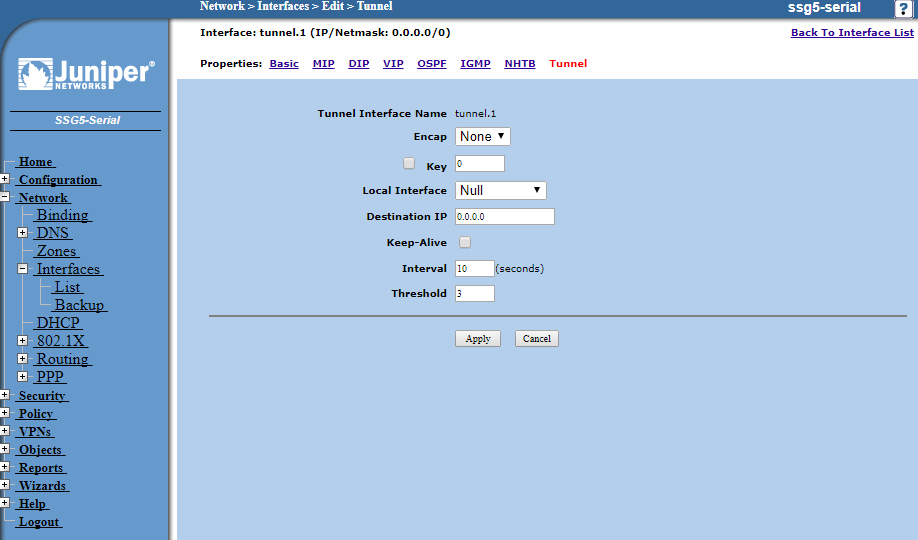
Leave the destination as 0.0.0.0 as the Gateway will determine the endpoint for the VPN, click Apply when finished.
The tunnel is configured, now move on to configure the VPN:
Under VPN on the menu on the left-hand-side of the main panel, click Autokey IKE and then New:
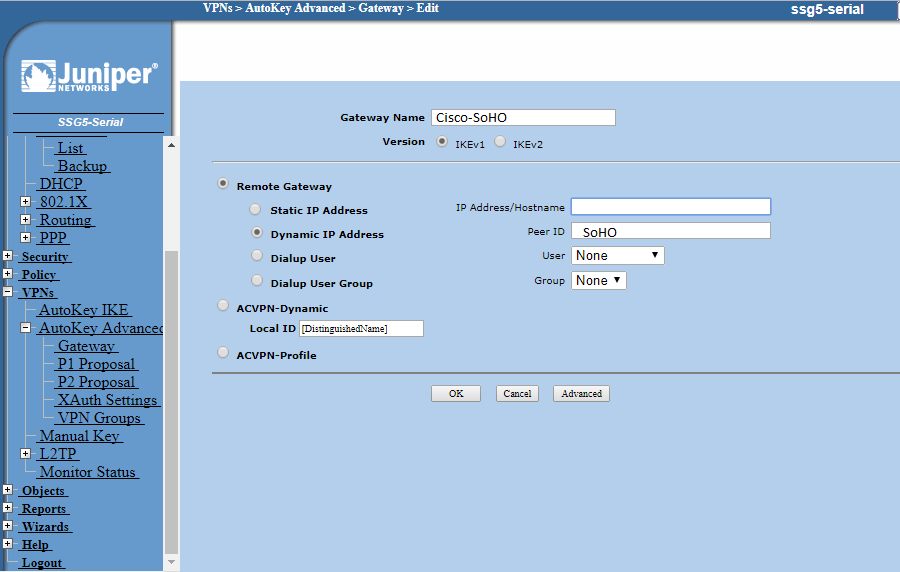
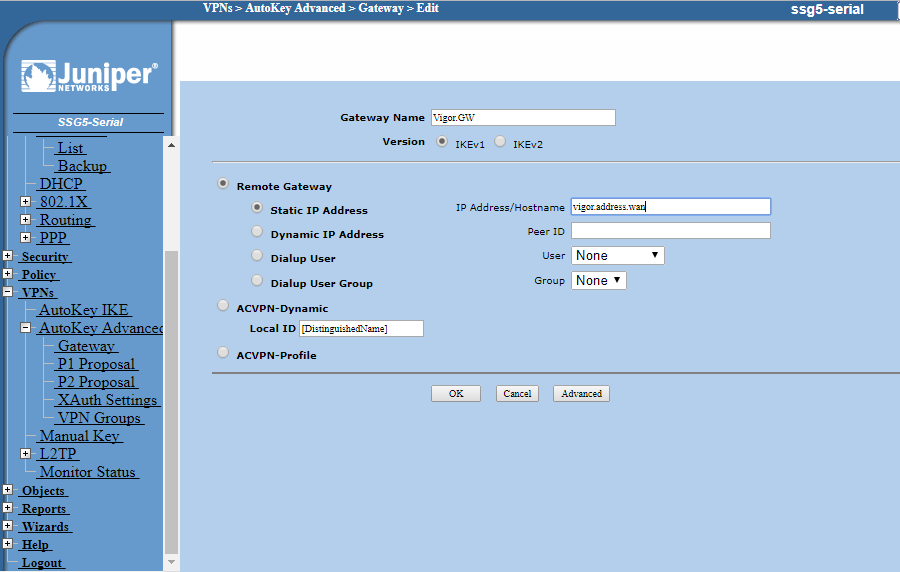
Click the bubble to Create a Simple Gateway and enter a name for the gateway. Leave IKE as ver.1 and choose Static IP and enter the Cisco WAN IP there.
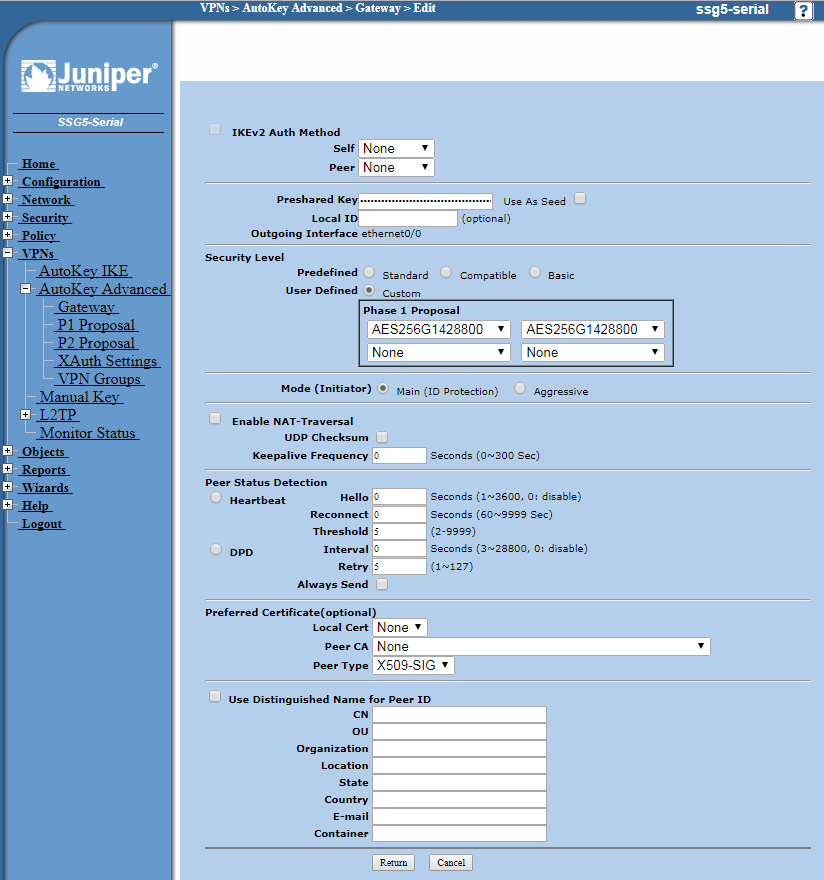
Now enter the same pre-shared key you entered at the Cisco SoHo. The Outgoing Interface will be the Juniper same WAN IP as earlier.
Now click Advanced:
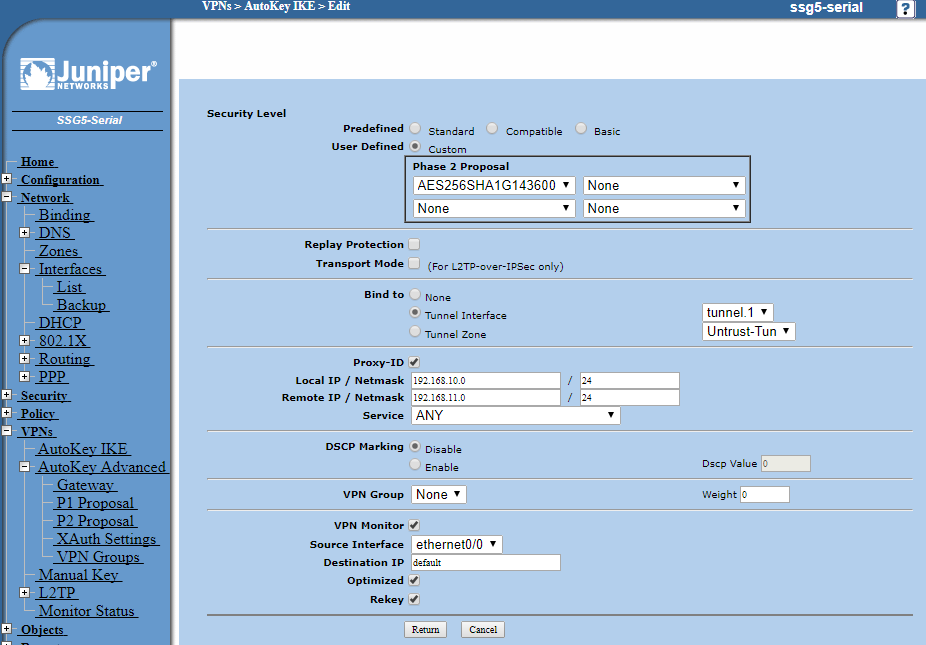
Here we are choosing the Phase 2 encryption proposal and so we select identical settings as we chose on the Cisco, 3DES 156-bit with DH Group 5 PFS and 28800 second time-out. Once again, if you selected a newer, most advanced encryption that is supported by both routers, be sure to enter the same as you did into the Cisco here.
Now enter the local and remote IP subnets, the local being the Juniper subnet you are sharing to the Cisco.
Set service to Any to allow all traffic to pass between sites via the VPN.
Tick VPN Monitor, Optimised and Rekey and leave the destination as default. Chose the external interface you pointed the Cisco to as the Source Interface.
Now click Return and OK. Now move on to configure the policies. The Gateway settings below are just for reference.
These pages have already been configured and are included for reference only in case you need to troubleshoot your Gateway settings:
Under Advanced:
Go to Policy then Policies and at the top choose from Trusted to Untrusted and click New.
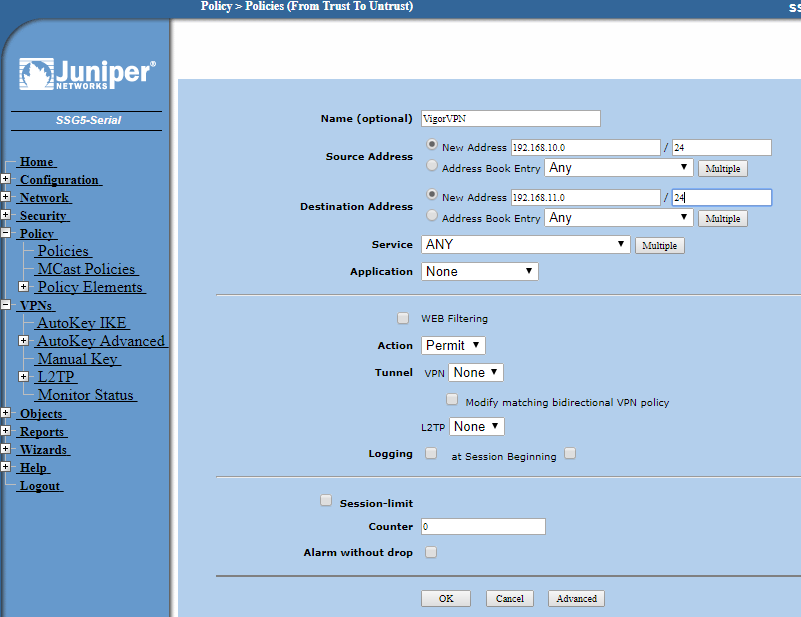
Give a name to the policy and then enter the local subnet as the source and the remote subnet as the destination address.
Make the service type Any then click OK.
At the top of the policy screen, select the opposite as before, from Untrusted to Trusted and New and configure the settings as you did above but with the Cisco remote LAN subnet as the source and the local Juniper subnet as the destination with the service set as Any.
This just allows traffic both ways through the tunnel within the Juniper firewall rules.
Now try and ping the LAN address of the Cisco from a machine behind the Juniper and see that you get a response.