Booting a Gen2 UEFI Disk2VHD VHDX Image in Hyper-V
I very often receive DISK2VHD exported files from other companies that we need to import to our systems for various reasons and whether we use partition software to convert to MBR the result is often that the VHDX simply loses all partitions.
The first step is always to take a copy of your original VHDX files and leave them safely in place.
Once you have your copy you can then test that it can be mounted in Windows 10 - if you can mount the system disk then the image is intact and you can proceed:
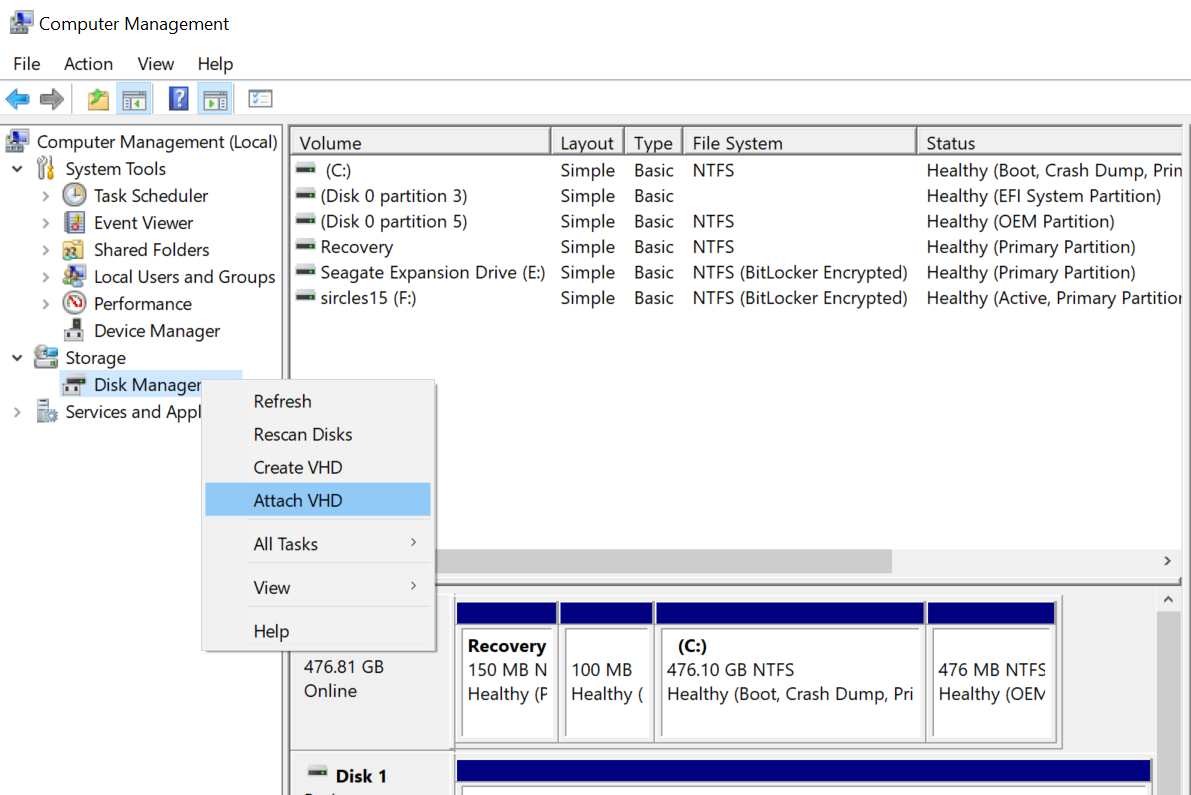
Once you have mounted the disk you should be able to browse the contents of the Windows drive...
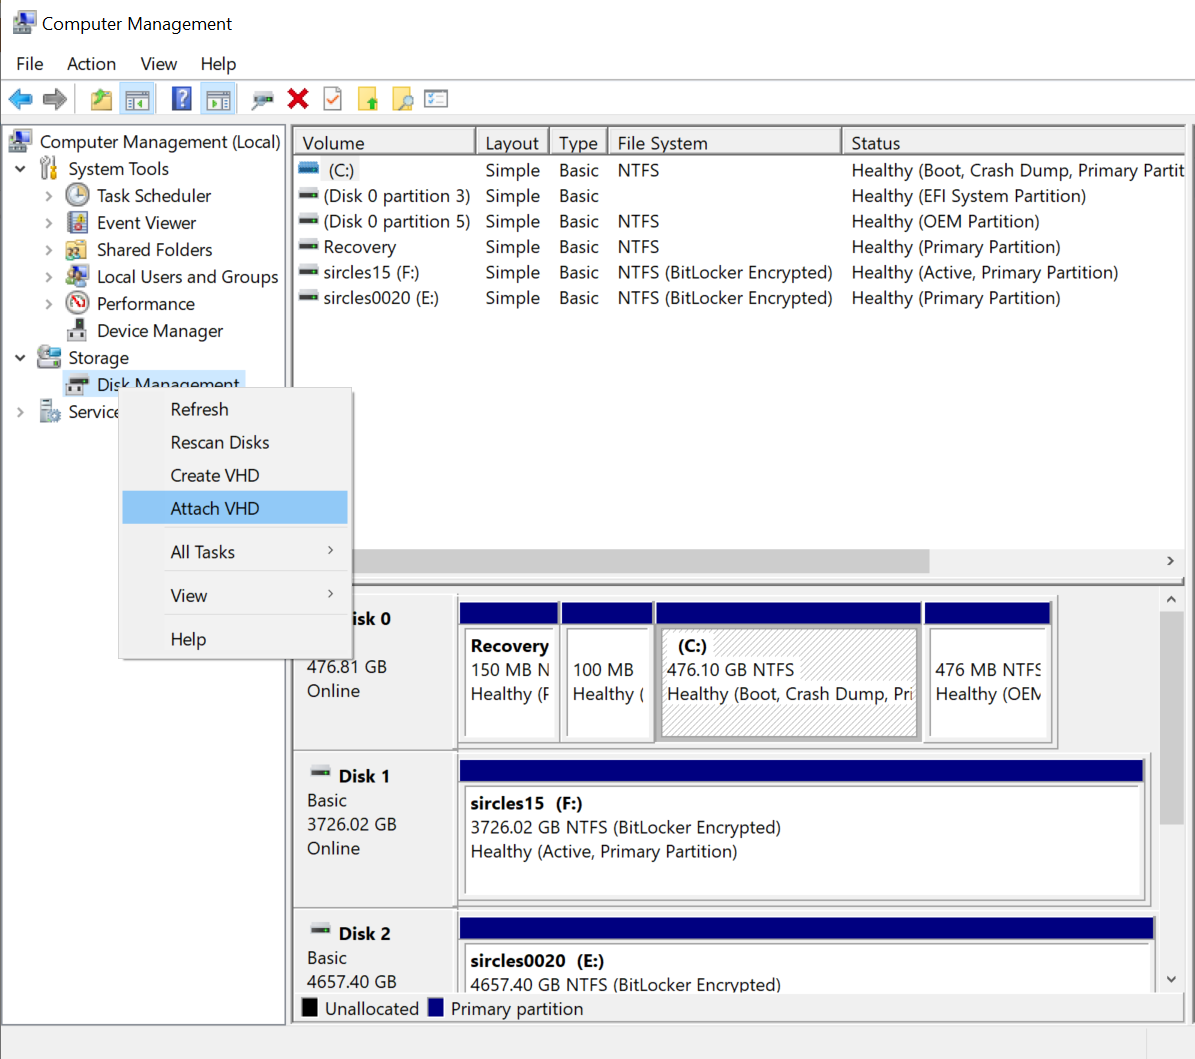
Now you need to fix the EFI partition - it probably shows up as RAW as it is not decipherable by your foreign environment, as it is a secured partition.
This happens because the EFI partition is secured to a single hardware ID and cannot be exported properly by Disk2VHD. We will need to remedy this if we are too successfully boot the VM in it's new environment.
In the below screen where we have mounted the VHDX for investigation, we can see that that there is a 100MB EFI partition (you can't quite see the RAW writing) but the partition is present. If you format this partition again, you can make it ready for use with the existing system partition, and successfully boot your system:
Now you can eject & detach the VHDX disk image from Computer Management.
Create your VM - make sure to choose Gen2 - with a Windows 10 DVD ISO (or Windows 2016/2019 server or similar Windows RE environment) as the first boot:
Now boot the VM, press any key to boot to the Windows RE DVD boot environment and when prompted, in the bottom left corner choose 'repair'
You must now choose troubleshooting and command prompt, where you must:
- Enter "diskpart" and press Return.
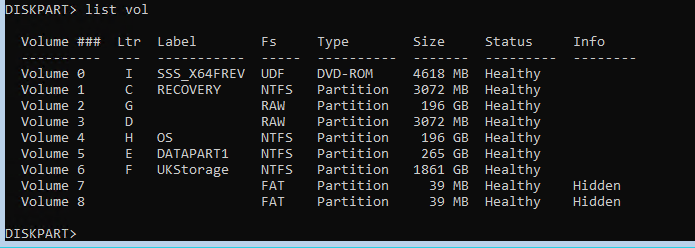
- Enter "list disk" and check that the system disk is disk 0
- Enter "sel disk 0" or whichever number disk (you can look it up in computer management, pictured above) is the the system disk.
- Enter "list vol" and press Return - note the drive letter of your Windows volume (most likely the largest option), as well as the 100 MB partition volume which says RAW next to it.
- Enter "sel vol #" where "#" is the number of the volume that says RAW next to it (this is the reason your VHDX doesn't just 'work' when Disk2vhd has completed, it has not taken an intact copy of the UEFI partition, which is completely normal as this is one of the features of secure boot.)
- Enter "format fs=FAT32" and press Return.
- Enter "assign letter=b" and press Return.
- Enter "exit" and press Return.
- Enter "bcdboot [systemdrive]:\windows /s b: /f UEFI" and press Return (where "[systemdrive]" is the drive letter of the Windows volume shown using the "list vol" command; "B" is the letter we assigned to the EFI System volume after formatting it to FAT32). (If you get an error here, try dropping the /f from this command)
- Now you have an intact EFI partition ready to boot to your system drive...
You should be able to see the system offered as able to boot by exiting the command prompt in the Windows RE environment, and now be able to boot directly to the VM.
If you have more than one 'RAW' volume then your image may have come from a Software RAID system in which case it may show two disks the same size or have other configuration that may need additional work. The simple rule you must adhere to is that you will need a single FAT UEFI partition that is first in the boot order that points to the OS or System volume. Once you have configured that then the system should boot. The RAW UEFI volume should be less than 100MB so do not choose anything that measures in GB for size. If you do not have a sub 100MB RAW volume then stop here - your UEFI may be intact if you have a < 100MB FAT volume.
In the above situation, it was just a matter of assigning the OS labelled volume as drive letter C, and one of the UEFI volumes, drive letter B and using the BCDBOOT command to recreate the UEFI data.
We then just ran
- BOOTREC /FIXBOOT
- BOOTREC /REBUILDBCD
And the 'Boot to Windows 2012 R2' was available as a boot option upon exiting WinRE