Sonicwall to DrayTek Vigor IPSec VPN Connection
Firstly, to set-up the Sonicwall NSA 250M we must set our IP address to connect to the routers address of 192.168.168.168
We are using Windows 7 in this example and so we find our network icon on the Windows Taskbar at the bottom of the screen, right click and select Network and Sharing Center to take us to our network settings:
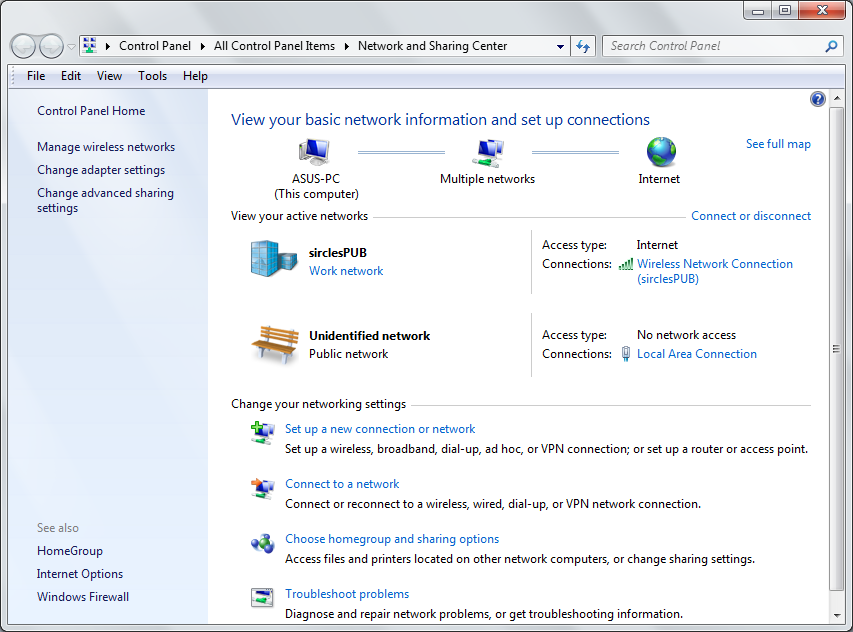
Our wireless network in the above example does not connect us to the NSA 250M - we are plugging straight in to the firewall and so we click on Local Area Connection which signifies our cable connection to the firewall.
Currently we have no network access and this is expected as the Sonicwall is currently set at 192.168.168.168 and the DHCP server on the device is disabled.
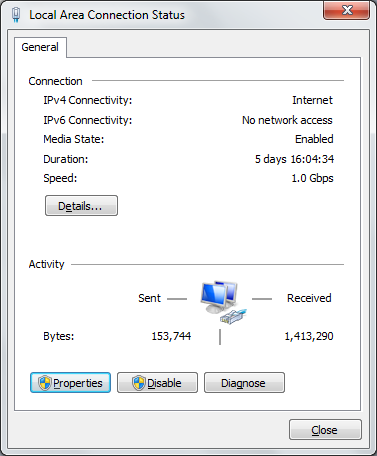
Now click on the highlight Properties button to enter the configuration section for the network protocols:
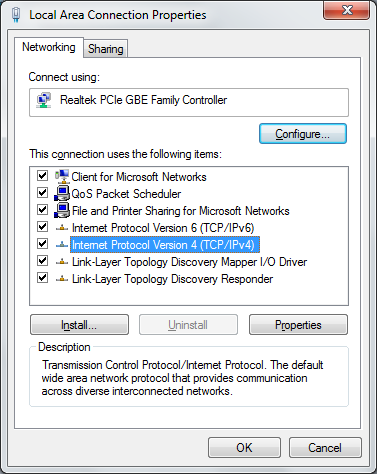
We need to configure a static IPv4 address and so we double click the above Internet Protocol Version 4 (IPv4) item to enter the IP address configuration section:
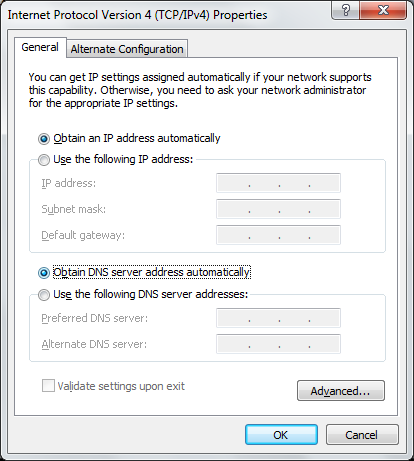
Change the above options to be Use the following IP address and enter the IP we will be using which needs to be in the same Class C subnet as the Sonicwall firewall. In my case I am choosing 192.168.168.169/24
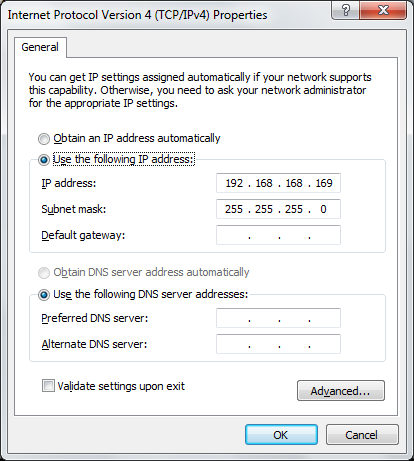
There is no need to enter a default gateway or anything else as this is just a temporary state for the network card.
You will see that the status for the connection now displays the new IP address:
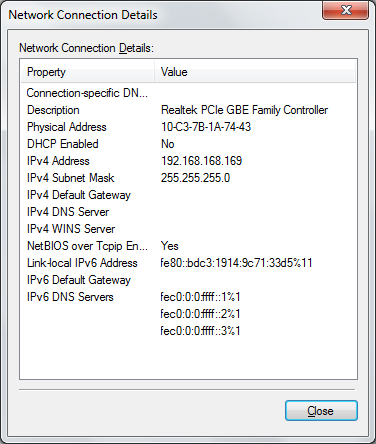
Press the OK button and we should now be able to ping 192.168.168.168
If you cannot ping 192.168.168.168 then try resetting the firewall again with a 10 second hold of the reset button with a pen or similar to ensure the firewall is back in default state.
We should now be able to browse to http://192.168.168.168 to enter the web configurator of the Sonicwall NSA 250M, the user is admin and the password is blank. As soon as you gain access, you will be asked to change the password:
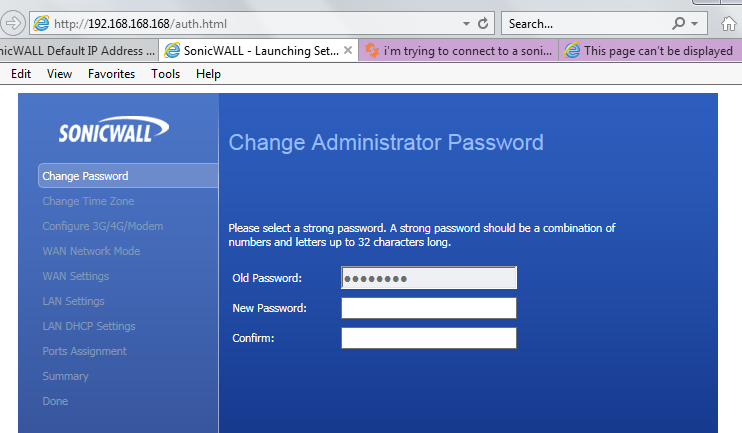
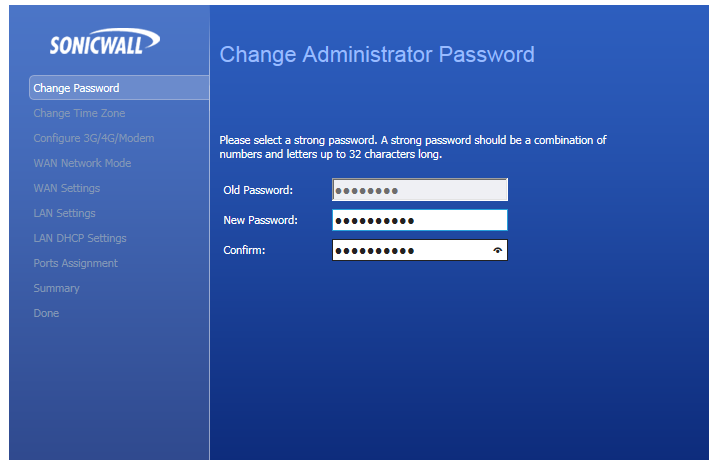
Enter a new password in the two boxes to set authentication security for your device - make sure it is a good one if you intend to allow external HTTPS access...
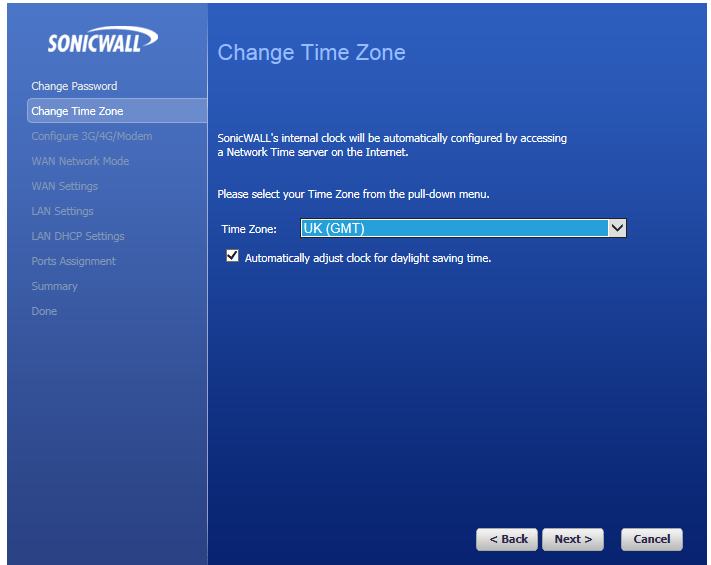
Now we shall set the appropriate time-zone:
Next we will configure the USB ports:
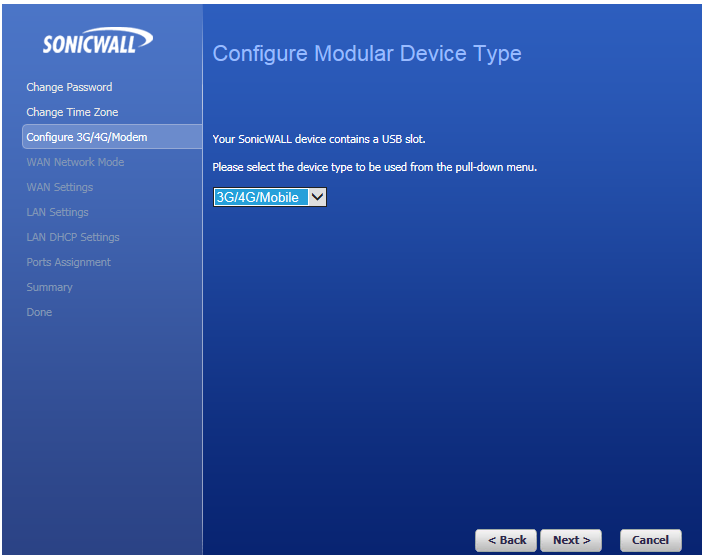
Then we are asked about the USB 3G/4G connection, which we will configure later...

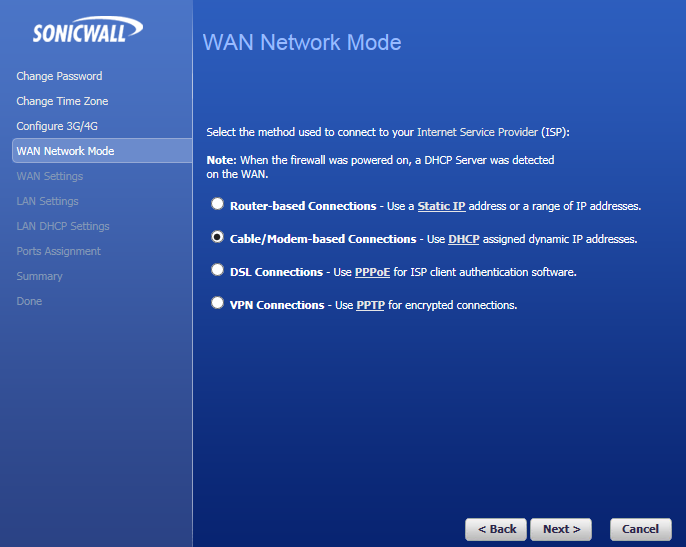
Now we must select the WAN mode, in this case the sonicwall is plugged into a dedicated fibre router that broadcasts DHCP and so we shall select the appropriate mode below:
Now set the WAN response level - do you want ping or HTTPS responses to be met - most cases you would just want PING but I am choosing HTTPS to ease along the VPN setup-.
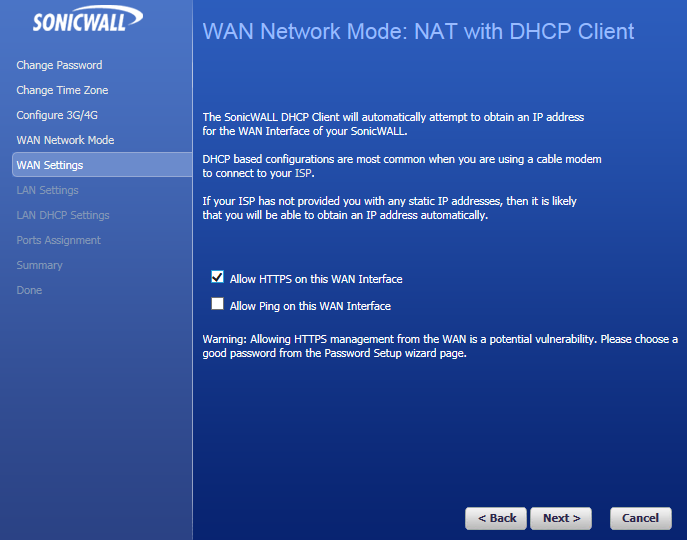
As you can see we are being warned about the security of this idea - it is a bad option, especially if you only have one IP address as it prevents hosting a web server.
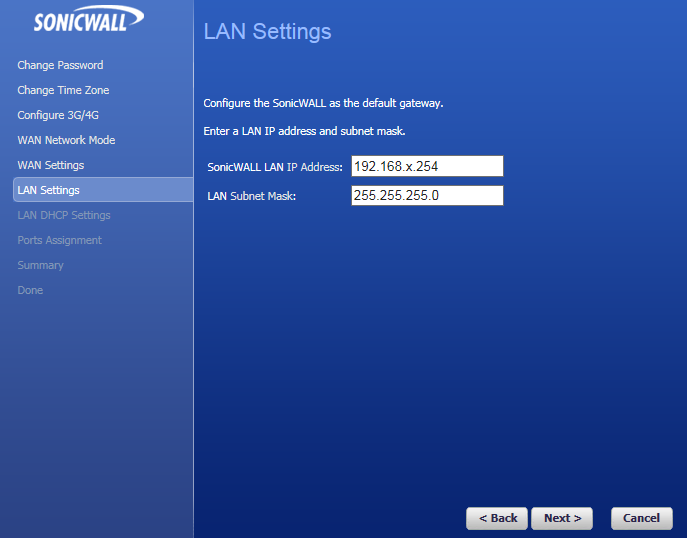
Now we can set the LAN IP and subnet:
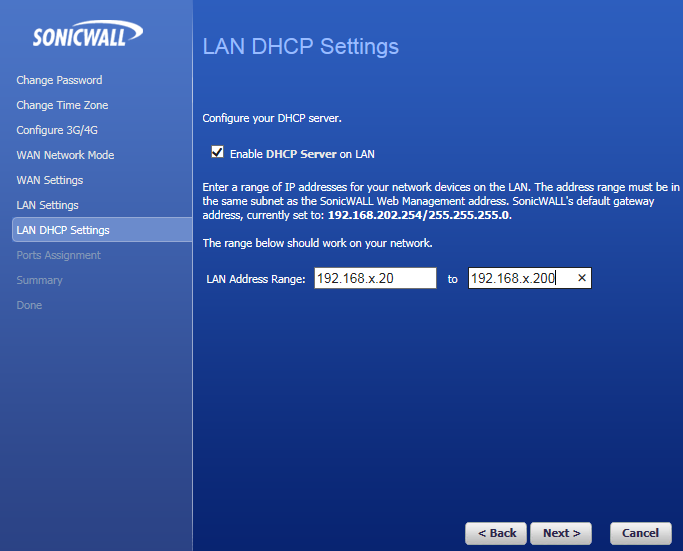
In the above we are setting the DHCP server on the firewall. The DHCP server is a decent version but you may wish to use Linux or Windows DHCP service instead, in which case you can disable this later or leave it disabled.
Now we move on to the ports assignment page:
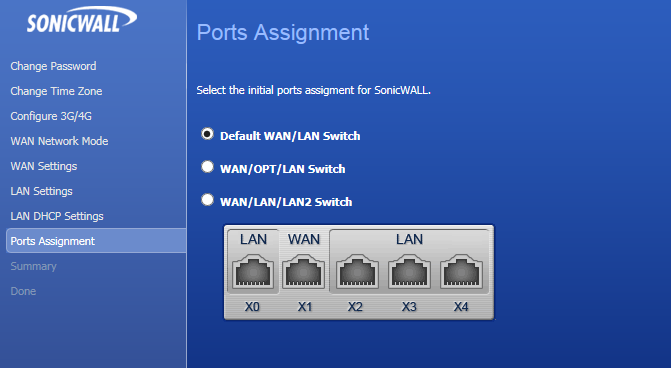
The above simply means that we are keeping the default option of XO being our trusted LAN port and X1 being our first WAN untrusted port.
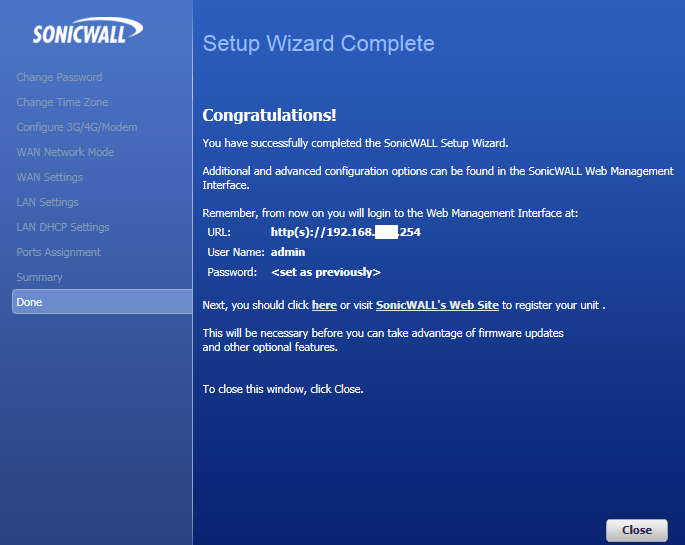
We can now review all of our choices in the summary section:
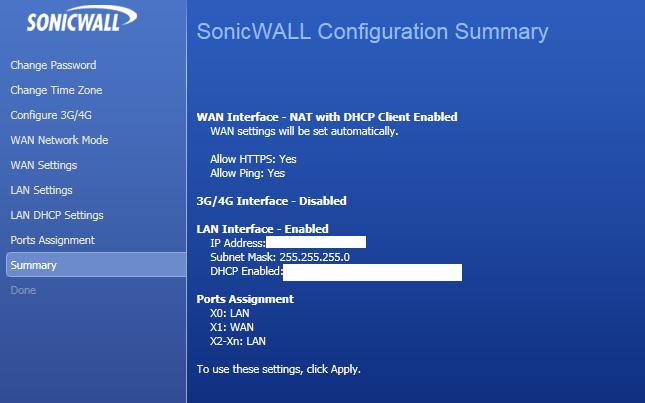
In the above I have blanked out the IP addresses as they are in use but you can see the options that were chosen clearly.
Now the device will reset and our PC or laptop will lose connctivity.
If you have enabled the DHCP server on the firewall we can now return our laptop to its deafult IP setting:
Return to the network and sharing centre:
Click the Local Area Connection link and choose properties, then double click the IPv4 item to get to your IP address settings:
Return the IP address assignment to automatic as in the below:
Now when you have rebooted the firewall, the laptop will gain an IP from the Sonicwall DHCP server if enabled. Otherwise you will need to manually set the IP address as you did before but with an IP address in the new subnet which you have just allocated for the Sonicwall.
you should now be able to browse the web using the local area conncetion via the Sonicwall.
Setting the VPN on the Sonicwall
Now that the Sonicwall is online and meeting with internet traffic we can begin the set-up of the IPSec VPN.
Log into the firewall and head down to the VPN settings page:
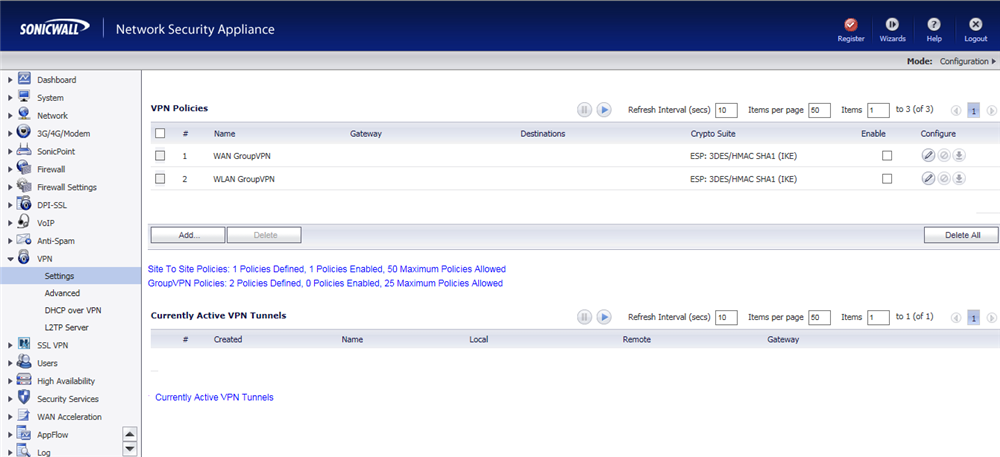
There are some default policies already but we are creating a new policy so click the Add button:
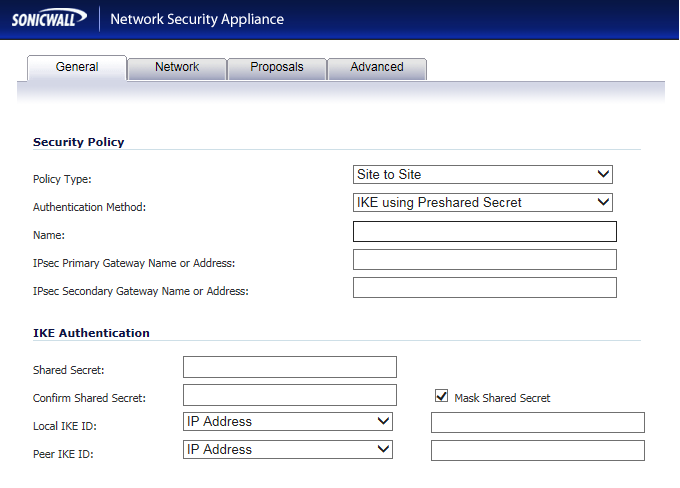
So in the above we are entering our VPN network details. Firstly we enter the type which we will leave as Site-to-Site
The authentication method can remain as IKE using Preshared Secret
The Name can be what you wish to help you identify the VPN
In this case we enter the Ipsec Primary Gateway Name or Address as the WAN IP address of the DrayTek 3900 we are connecting to.
The secondary we are leaving as this is not a VPN equipped with redundancy.
In the shared secret we enter our preshared secret which should be a randomly generated string that you must enter precisely into both devices at either end of the VPN
The local IKE ID will be left as IP addresses and you can leave the corresponding boxes blank to use the default IP addresses which we will do in this case.
Now we move on to the Network section:
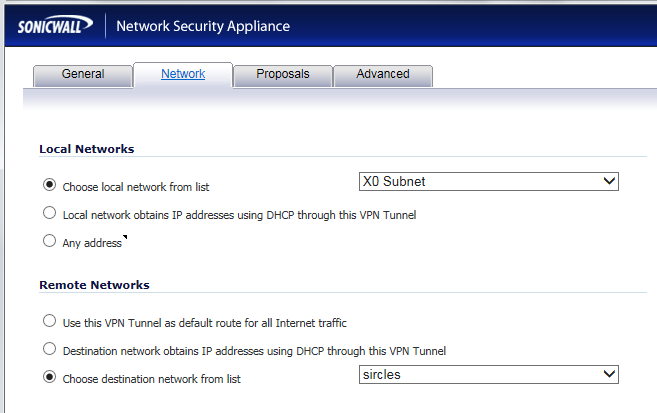
We are using the subnet of the LAN port in the above and the easiest way to choose this without adding any other networks that might dissuade the DrayTek from allowing the connection is to choose the subnet attached to just the LAN port X0
We create a new subnet from the drop down which has already been performed in the above. We are presented with the new remote subnet dialogue:
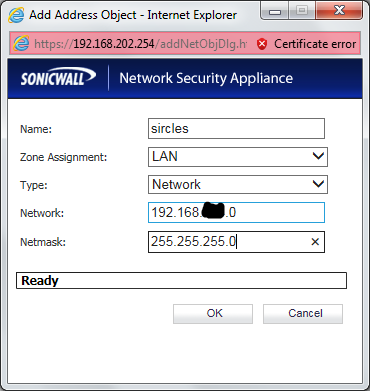
In the above we enter the LAN segment behind the DrayTek to which we are trying to gain access; this will be the network made available to us through the Sonicwall-DrayTek VPN tunnel, the subnet the Sonicwall is guarding.
Click OK to return to the previous dialog and then progress to the Proposals tab:
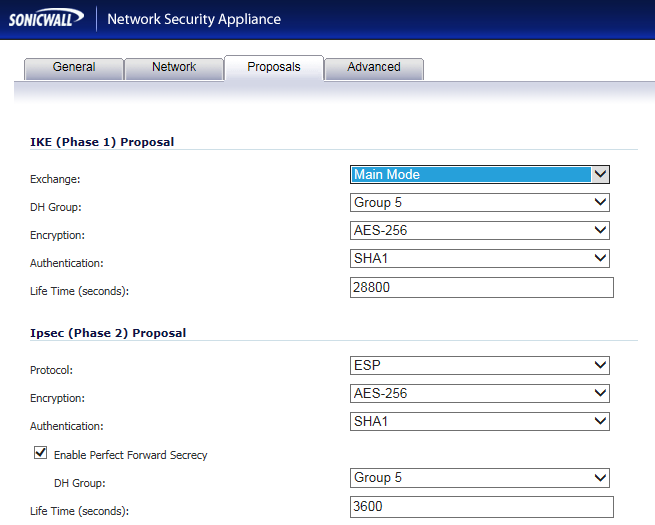
In the above we are matching the Sonicwall to the default DrayTek 3900 proposals which means we are using AES-256 with group 5 and SHA1
In this case we are also enabling PFS with group 5. Enter the details as above and move onto the advanced tab:
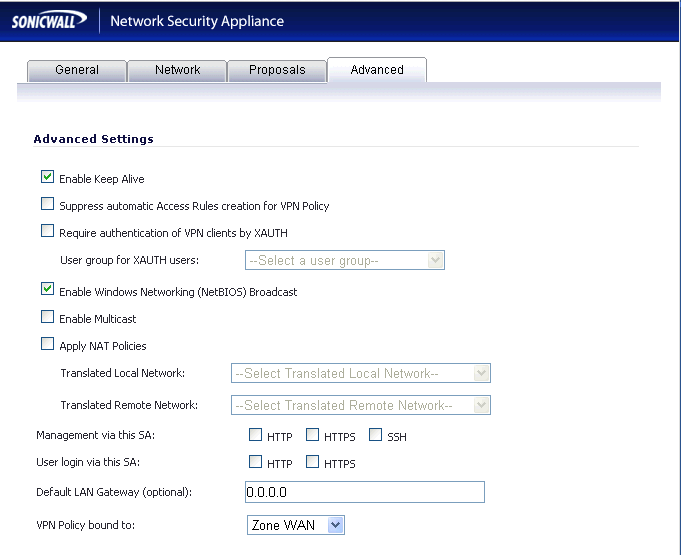
Here we only need enter a tick in keep alive and enable Windows Networking (NetBIOS) broadcast boxes, everything else can remain as it is. This simply means that the VPN will remain alive even without traffic which will enable packets to traverse between the networks more easily.
We can now complete the VPN settings and return to the VPN setting page. We now turn our attention to the DrayTek end of the VPN.
Setting the DrayTek Vigor 3900 VPN Endpoint
Log into your DrayTek webpage and proceed down to the VPN IPSec Profiles page and click Add to create a new profile:
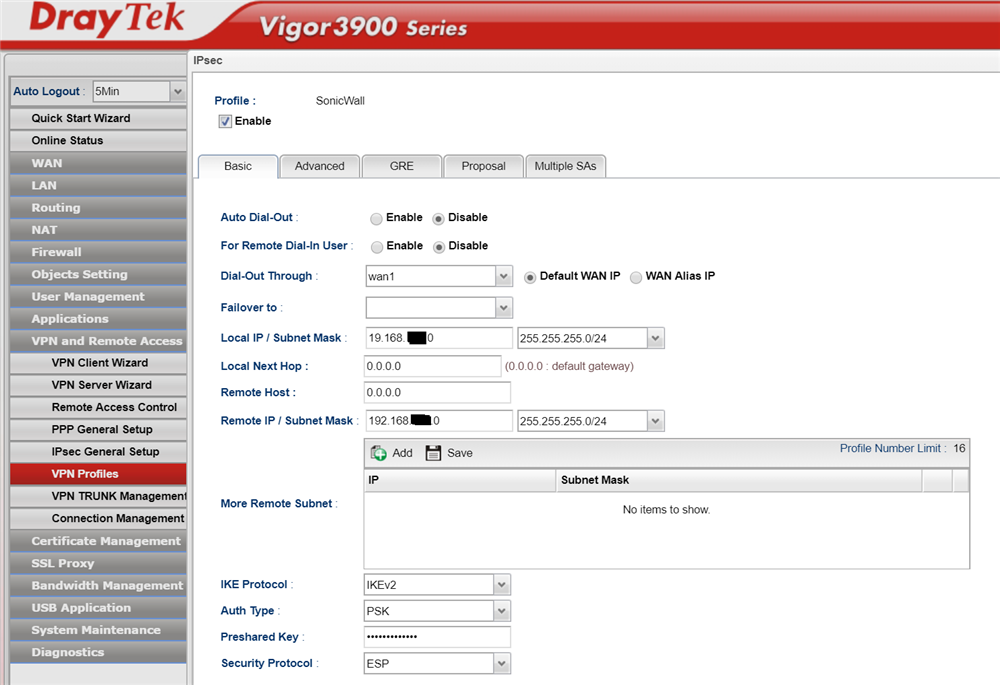
Enter your details as above and make sure that the local IP subnet are those behind the DrayTek router and not the Sonicwall.
In the above example the Remote Host entry is set to 0.0.0.0 but this must be set to the WAN IP address of the Sonicwall
The Remote IP / Subnet Mask is the local LAN subnet behind the Sonicwall to which you wish to gain access from the DrayTek LAN.
The IKEv2 option is chosen and PSK (PreSharedKey) is chosen to match the entries we made on the Sonicwall. Here you must enter exactly the key which was entered into the Sonicwall pre-shared key box.
The security protocol is left set as ESP
Now we move onto the Advanced tab:
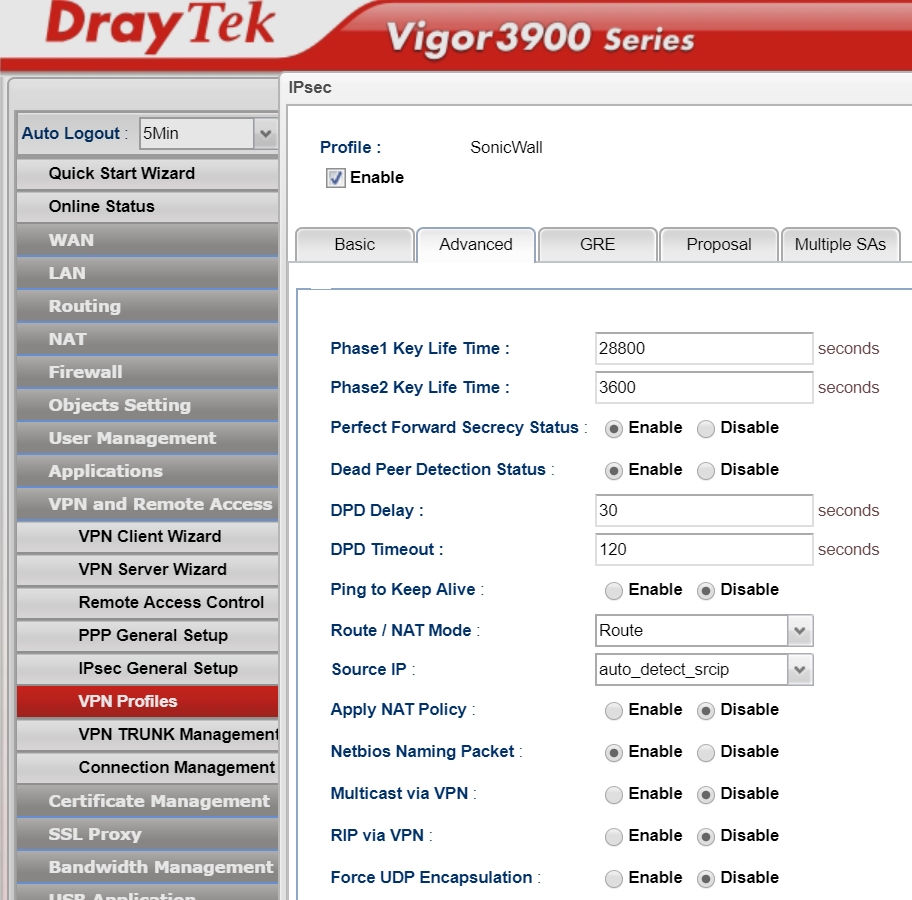
Some of the above is left as the default as we chose the settings on the Sonicwall to match - the timeouts are still the same for instance.
We are selecting Perfect Forward Secrecy and Dead Peer Detection and allowing NetBIOS traffic as we did before on the Sonicwall to keep the VPN alive.
We now need to configure the Proposals tab:
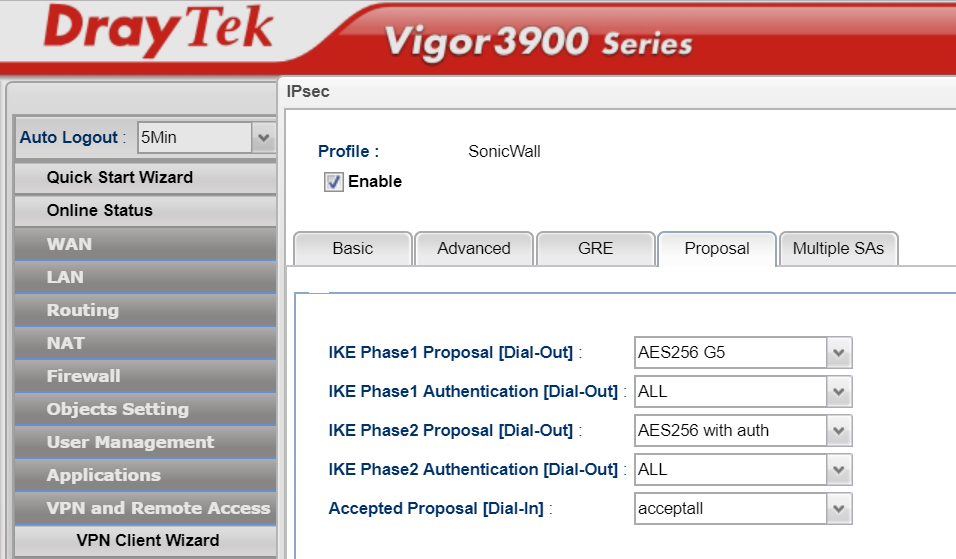
We are once again selecting AES256 Group 5 as our proposals and allowing ALL and Accept All as the Sonicwall will only be offering SHA1 anyway.
We now complete the IPSec VPN by clicking apply/OK and return to the VPN configuration page:
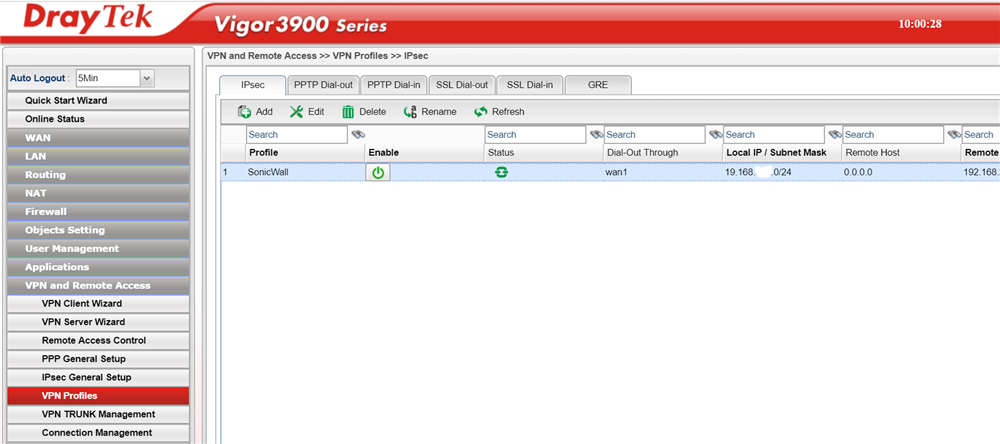
We can see there is some activity from the status above but if we continue to the connection status page as below:
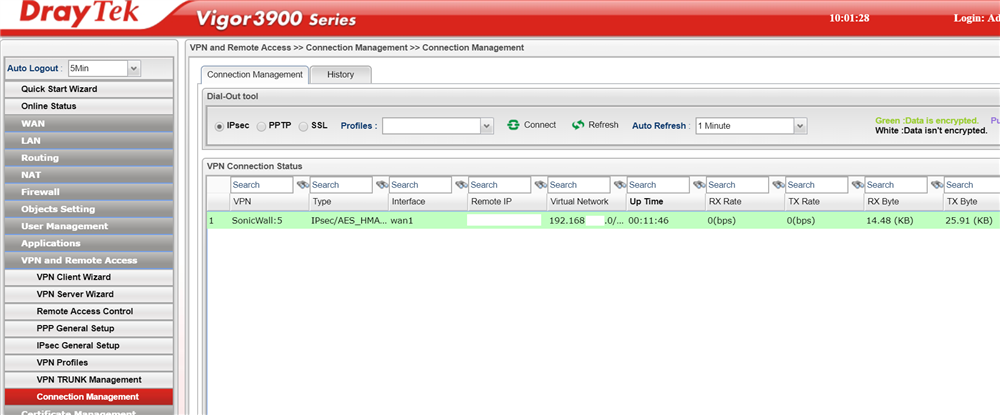
We can clearly see that the DrayTek Vigor 3900 believes the VPN to be active and if we check the Sonicwall:
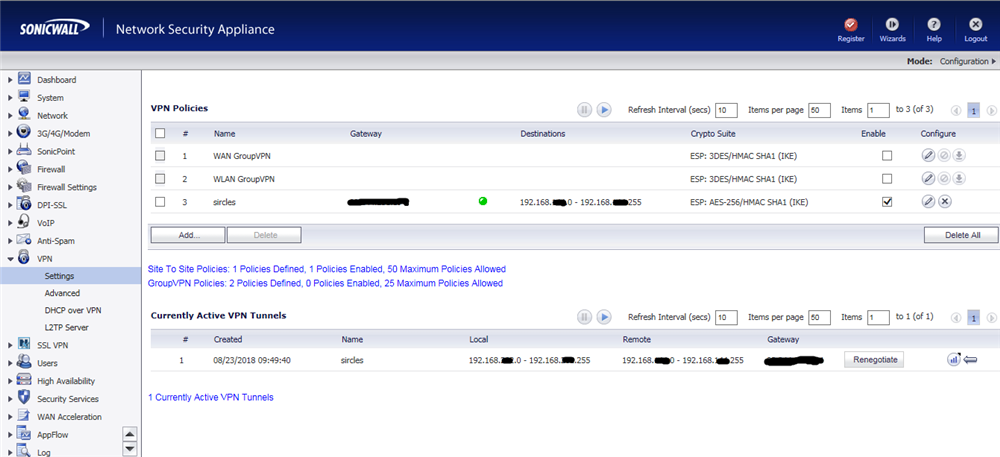
We see the tunnel is alive at the other end also.