Oi Windows 10, give me back my PC !!!!
If you are, like me, a very boring web user who doesn't go to many unknown websites or watch lots of unsubscribed videos etc. then you might be feeling a little annoyed with the new 'compulsory real-time monitor' arrangement that Windows 10 suffers from. It is, of course, a sign that your computer hard disk drive is now performing two or three times the work for many operations compared to how it was functioning on Windows 7. Real-time scanning (as the word real-time is supposed to explain) means that every file your computer needs to open is examined in advance by a proprietary process before the system comes into contact with it. Now there are two reasons why I don't like this thinking. The first is the obvious performance problem (and whether that wastes more time, energy and money than all the viruses in the world put together is another question.) The second is that Windows 10 downloads so many updates of such unbelievable magnitude that they kill the performance of your machine and the internet and so what is the point of Windows Defender anyway? This is further compounded by the fact that Windows Update, like Windows Defender, now appears to be compulsory.
OK so let’ shave a look at all of the components and how we can disable them as Microsoft have recently started to run scheduled tasks to make sure that the most performance hungry Windows processes are restarted and re-enabled at regular intervals such as Sharepoint Sync in Microsoft Office and Defender in Windows 10.
So we will begin by using the simplest and safest way to disable the Windows Defender Components, using the registry editor.
If you press the Windows key and type 'regedit' and press enter you will be presented with the registry editor and you will need to navigate to the following area:
HKEY_LOCAL_MACHINE\SOFTWARE\Policies\Microsoft\Windows Defender
This means that under HKEY_LOCAL_MACHINE you expand the folders (called keys in registry editor, even though they lok the same - they are not folders, they are completely different - )
When you find the correct key, you highlight it on the left and then right click on the right hand side, below the (Default) value and select New > DWORD (32-bit) Value
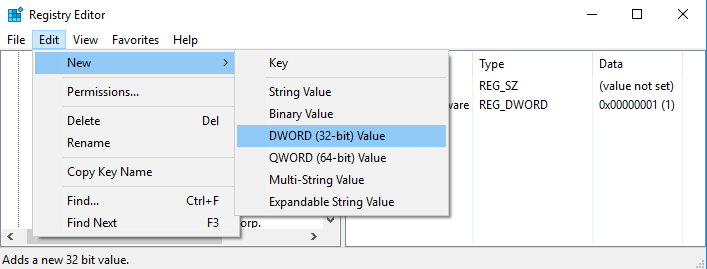
Give the DWORD the name DisableAntiSpyWare and once it has been created, double click the DWORD and enter the value '1' and press OK so that you have the below:

Now let's try restarting Windows 10....
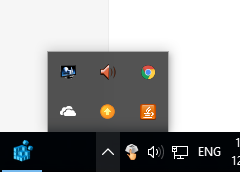
OK so according to the above view from the taskbar, the Windows Defender application is not running. Let's have a check under the services running by clikcing the start buton and typing services.msc.
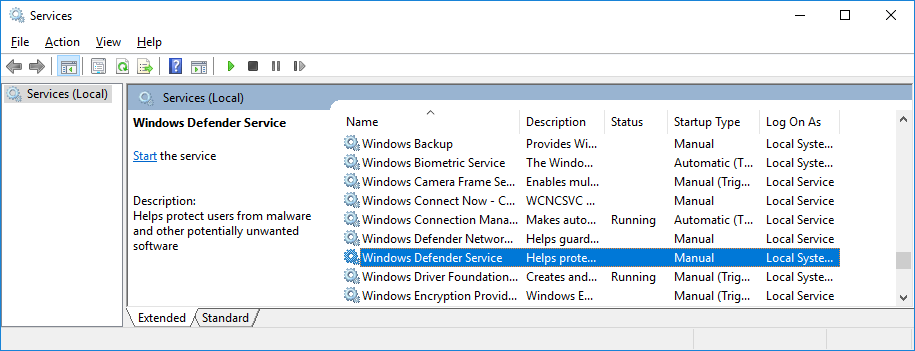
OK excellent, the service has been stopped and is now set to manual. This is going to speed us up nicely. But now how do we stop the automatic updates from hogging all of the bandwidth and disk speed?
Well there are many sites telling me to use metered connections or policies to disable this function, but the Windows update feature can be disabled by opening up the services.msc applet and disabling the service by finding it as follows:
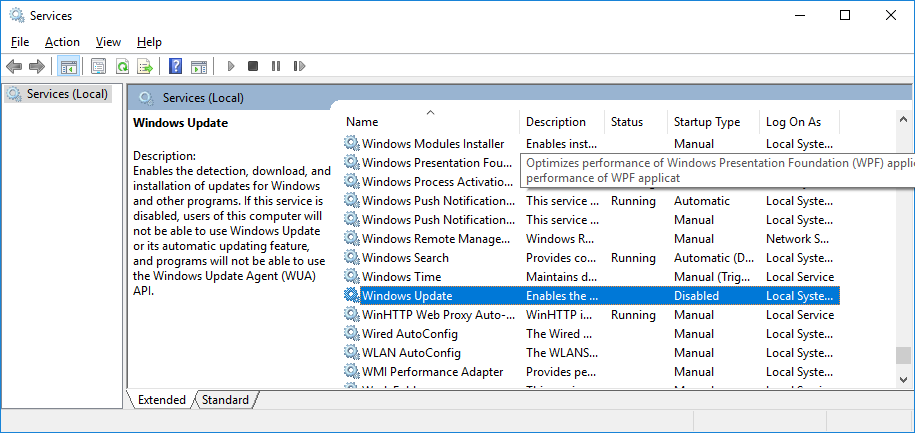
NB This service has already been disabled but your will not have been.
Now double-click the update service and choose the start-up type:
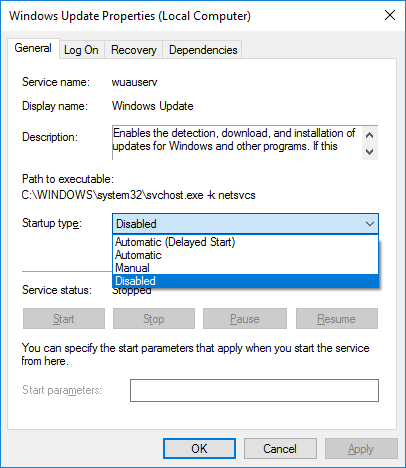
Once it is set to disabled then click OK to confirm.
Now we are back in control of our Windows 10 PC and our Ineternet connection, RAM, Hard Disk and CPU are all our own again.